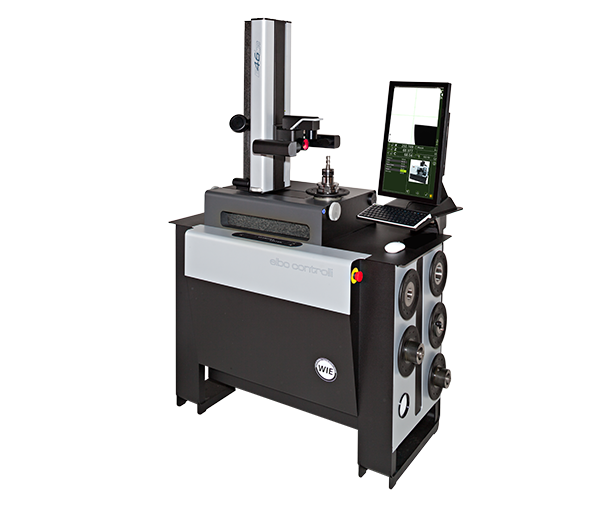
TECHNICAL DATA

- Measuring range: diameter max. 320 mm (radius 160 mm), height max. 600 mm.
- Machine structure in steel offering high mechanical durability and long life, floor mounted with 3 fixed support and 1 adjustable support in steel, equipped with keyboard and monitor adjustable support.
- Base and column made of natural granite: linearity max error 2 µm/Mt - certification with Taylor Hobson res.1 µm/Mt. electronic millesimal level.
- ISO / BT / HSK / VDI………. etc. Interchangeable rotating spindle-holder (to be specified) max run-out error < 2 µm.
- Double vault arc prismatic slideways: n°2 X axis slideways, n°1 Z axis slideways.
- Double re-circulating ball bearing slides, lubricated for life (4) (preloading slides/slideways: P/H class).
- Universal mechanical tool clamping managed via software (ISO/BT tools only).
- Tool-holder taper connection control (run-out test, ISO/BT tools only).
- Pneumatic-mechanic brake of the spindle-holder rotation with radial compensation of the clamping force: no axis angular run error.
- Constant load Archimedean spiral spring (as opposed to a mass counter-balance system).
- Machine operator interface through:
- Full HD LCD 22” colour Touch-Screen monitor
- Intel I3 Quad Core Processor
- UBUNTU 14.04 LTS LINUX operating system
- Data storage on solid state disk SSD
- X and Z axes block management with control maximum speed of translation 2mm/sec
- 4 USB ports (keyboard, mouse, Dymo printer and one spare) and 1 LAN port
- Standard Software:
- CNC machine origin management and adapters
- Tool list creation and/or single tool
- Automatic change of CNC machine origin allocation
- Tools set and Post Processor universal generator
- Magnetic chip code-holders (Balluff for example, hardware not included)
- Printable tool set report
- Theoretical measurements and tolerances management
- Main Camera: tool measurement (diascopic) and cutting-edge inspection (episcopic):
- Bi-telecentric lens
- Optical doublets at low F/Number in order to eliminate the error of the clearness circle
- Magnification 26X, digital zoom 2X and 4X available
- C-MOS sensor 1,3 Mega pixels, USB 2.0 high speed connection
- Framed image area 10 x 10 mm (3 times bigger than standard values)
- Episcopic illuminator with ring lens and red lens, diascopic illuminator with puntiform light red
- Second/Third Camera: cutting-edge inspection (episcopacy) with on screen measurement:
- Bi-telecentric lens
- Opportunity to view the tool from the top (front) or from the side (chest). Thanks to the rotating support by 90° degrees, the camera can be removed from above not to obstruct the measurement operations.
- Magnification 60X, digital zoom 2X and 4X available
- C-MOS sensor 1,3 Mega pixels, USB 2.0 high speed connection
- Framed image area 4 x 4 mm (3,9 µm/pixel)
- Illuminator: episcopic ring with diffused light and low angle: reducing glare caused by tool surface characteristic
- ELBO CONTROLLI Linear Transducers in optical glass type SLIDE 371 certified HP laser
- Axes resolution: X= 1 µm, Z= 1 µm
- Anti-dust cover provided for when not in use.
- Overall dimensions : L= 1237 mm, H= 1874 mm, P= 646 mm
- Net weight: 265 kg
OPTIONS:
- Spindle index in four angular positions: 0°-90°-180°-270°
- C axis display spindle body and spindle-holder
- Spindle-holder Identification System (SP-ID), mounted on the spindle body
- Spindle-holder Identification System (SP-ID) for additional spindle-holder, mounted on the interchangeable spindle
Характеристики
| Основные атрибуты | |
|---|---|
| Производитель | Nikken |
| Гарантийный срок | 12 мес |
| Страна производитель | Япония |
Спецификация
Информация для заказа
- Цена: Цену уточняйте
- Способ упаковки: в коробке


 Отправка с 19 мая 2024